Thursday, December 8, 2011

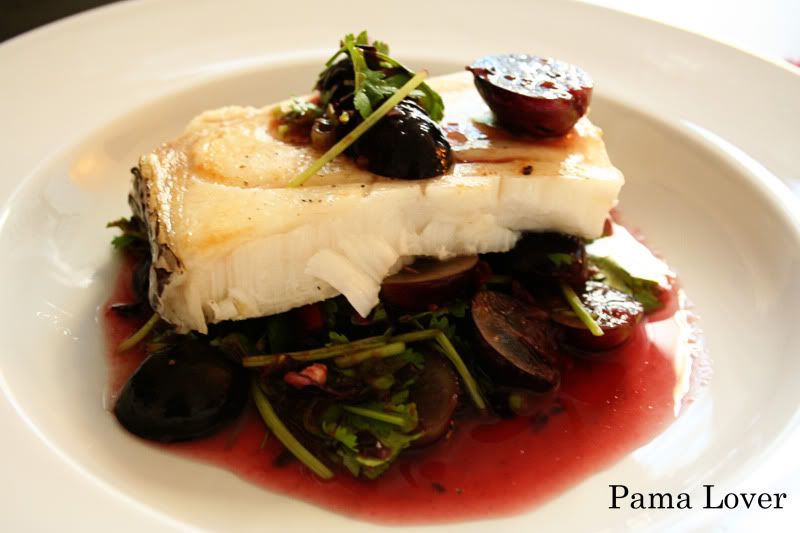
Pan-Seared Black Cod with Grape Salsa Recipe

Photobucket

I can’t believe my life is such a hectic these days. Christmas holiday is coming and a lot of shopping needed to be done. Sometimes, I wish I could be in 2 places in the same time but that don’t exist in reality. I do miss the time where I have plenty of time to waste and just think bout the things I want cook and just run to the grocery store and made my day.

Anyways, I’m going to share with you guys with this awesome recipe I just tried couple months ago. YUP! You did not read it wrong. Couple months ago. I’ve wanted to update as often as I can but time just won’t allow me to do so. But today is a good day and taking this opportunity to update as quickly as I can while waiting for my dear hubby to come home from work.  But I will try my very best to remember everything about this dish.

The reason why I tried this dish is because I bought 5 lbs of grapes from the store and realized it’s too much for the 2 of us to finish it in time before it turns bad. And I found this great recipe to use the grapes. Grape Salsa! I just don’t know why I never though of it. And what amazing is that, I had a fish stock up in my fridge.

So, I pan seared my fish and I like it to be crispy. And you can cook the way you like it. And the sourness from the citrus made it more appetizing for me. If you love it spice, just add hot pepper to your preferred.

Hope this entry helps you with today’s headache.


Ingredients:
2 pounds red or black seedless grapes, 1 pound quartered
2 scallions, finely chopped
2 small garlic cloves, minced
½ fresh red chile, such as Fresno, seeded and minced
½ fresh green chile, such as Serrano or jalapeno, seeded and minced
1 teaspoon Sriracha chile sauce
2 tablespoons vegetable oil
Ten 4 – 5 ounce skinless black cod fillets (also known as sablefish)
Salt and freshly ground pepper
¼ cup chopped cilantro
1½ tablespoons white wine vinegar


Method:
1)   Preheat the oven to 350C. In a food processor, puree the whole grapes. Pass the puree through a coarse sieve into a large bowl. Add the quartered grapes, scallions, garlic, chiles and Sriracha to the bowl and toss.
2)   In a large nonstick skillet, heat 1 tablespoon of oil until shimmering. Season half of the fillets with salt and pepper and add them to the skillet, skinned side up. Cook over high heat until the fillets are golden brown on the bottom, about 3 minutes. Transfer the fillets to a rimmed baking sheet. Repeat with the remaining oil and fillets. Transfer the fish to the oven and cook with just while throughout.
3)   Add the cilantro and vinegar to the grape salsa and season with salt. Transfer the fish to plates; spoon the salsa on top and serve.

MAKE AHEAD The salsa can stand at room temperature for up to 2 hours. The seared fish can be kept on the baking sheet for up to 30 minutes. Finish in the oven before serving.

Tuesday, August 30, 2011

Famous Dave's Restaurant


Everyone told me bout this restaurant on how great the BBQ was. And so happened as we were looking for a place for dinner, Calvin from a far saw the signature and that’s when we decided to give it a try. Was pretty excited to see everyone’s plate with the same thing. BBQ must be good in your first thoughts.

Interior was great. A little Texas feel on it!

Since we in a big group, we get the family meal which enough for 4 – 6 person. Price is descent. Ribs are okay for me. I wish it could be better. Why? Because the meat just don’t came off from bone without working on it. If you get what I mean. Sauce is okay too. Normal bbq sauce. BUT they have the best bread pudding. Definitely going back for the dessert and give the ribs another chance. Maybe we just get the bad batch of ribs.

Photobucket


Photobucket


Photobucket


Photobucket


Photobucket


Friday, August 19, 2011

Cinnamon Scrolls Recipe

Photobucket


I love the smell of cinnamon that just came out from the oven. And it never failed to seduce me to get one of them. And one of my favorite places to have some cinnamon will be at Ikea. Believe it or not? Every time I line up for check out; I couldn’t stop wanting the cinnamon bun and I told myself all the time. Not this time!! Not on diet or whatsoever. I just hate it when my little devil asking for it and not eating later on. Wasting of mullah!

So today, I’m going to share with you cinnamon scroll. A little different from the bun but the same technics. Why? Because I never try making bun before and don’t want to waste my time on something I’m not familiar with. And of course, I will try making some bun in the future when time allows me.

If you like scones; then you will definitely like this one because it’s about the same texture. My hubby not a big fan of it! Sometimes, I do wish I’m surrounding with siblings or close friends than I can enjoy with. When you’re living in a big city that require driving all the time; is making hard for everyone to build a close friendship because everyone is so busy with his or her own little life. Maybe that’s how it supposes to be when we getting older and I’m still glad I have couple good friends that I can share them with.  

Anyways, here is the recipe:


Ingredients:
250g (9oz/2cups) self-raising flour
pinch of salt
90g (3 ¼ oz) unsalted butter, chopped
170 ml (5 ½ fl oz/ 2/3 cup) milk

Filling
60g (2 ¼ oz) unsalted butter, softened
2 tablespoons soft brown sugar
1 teaspoon ground cinnamon

Icing
60g (2 ¼ oz/ ½ cup) Icing (confectioners) sugar, sifted
2 teaspoons boiling water


Method
1.     Preheat the over to 210C (415F/Gas 6-7). Lightly grease a baking tray. Sift the flour and salt into a mixing bowl. Using fingertips, rub the butter into the flour. Make a well in the center and add almost all the milk. Mix lightly, with a flat-bladed knife, until soft dough forms, adding more liquid if necessary. Knead the dough briefly on a lightly floured surface until smooth. Roll out to a 40x25 cm (16x10 inch) rectangle of 5mm (1/4 inch) thickness.

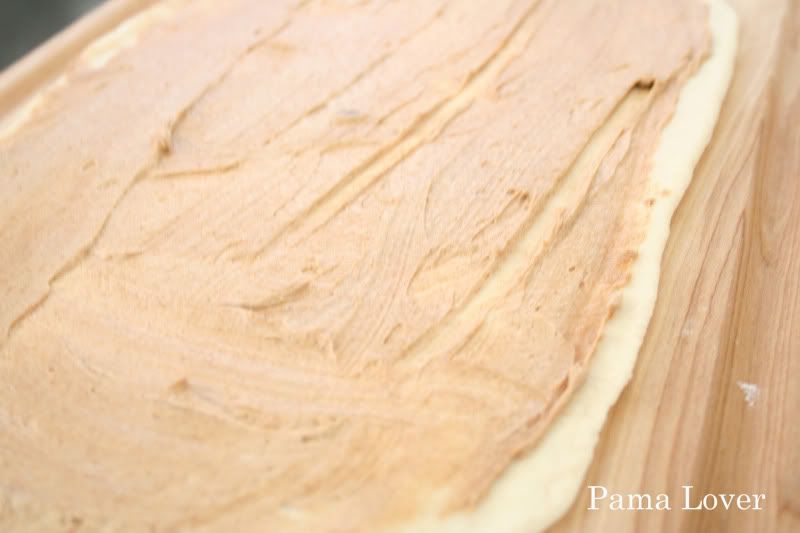
2.     To make the filling, place all the ingredients in a mixing bowl. Using electric beaters, beat until light and fluffy. Spread the filling evenly over the dough rectangle and roll up from the long side. Using a sharp knife, slice the dough into twelve 3cm (1 ¼ inch) pieces. Place the dough pieces close together, cut side up, on the prepared tray. Bake for 12 minutes, or until golden brown. Remove from the oven and leave to cool slightly. Drizzle the icing (see step 3) over the top.

Photobucket


3.     To make the icing (frosting), combine the icing sugar and boiling water in a small mixing bowl. Beat the mixture until smooth and well combined.

Wednesday, August 3, 2011

Thai-Style Whole Snapper Recipe

Photobucket


Fish is one of my favorite dishes. I grew up eating fish every day and it became a habit to me. But I don’t get to eat fishes here that much as I find it expensive from where I came from and it’s not as fresh too. I tried to stock it up when I see some fresh fishes at the grocery store.

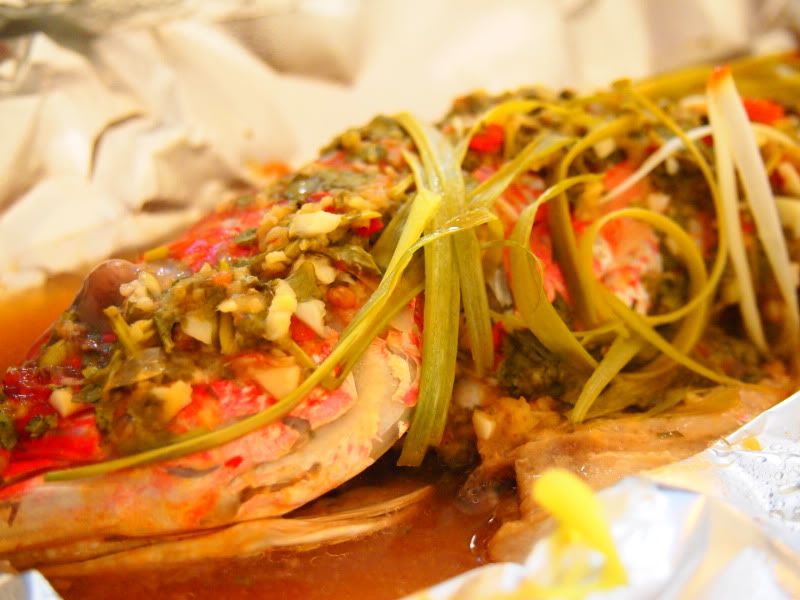
So today, I decided to share with you guys this easy and quick recipe. No pan needed! What I like most about this dish is that there lemony taste of it. Sour sweet in one dish. So appetizing! I can eat 3 bowls of rice just by having this fish. And the ginger took out the fishy smell of it and the taste of cilantro. Hmm… totally YUM!! I can have this over & over again.

 Ingredients:
2 garlic cloves, crushed
1 tablespoon fish sauce
2 tablespoons lemon juice
1 tablespoon grated fresh ginger
2 tablespoons sweet chili sauce
2 tablespoons chopped fresh coriander
1 tablespoons rice wine vinegar
2 tablespoons white wine
600g (1 1/4 lb) whole snapper, cleaned and scaled (ask your fishmonger to do this)
2 spring onions, cut into thin strips

Method:
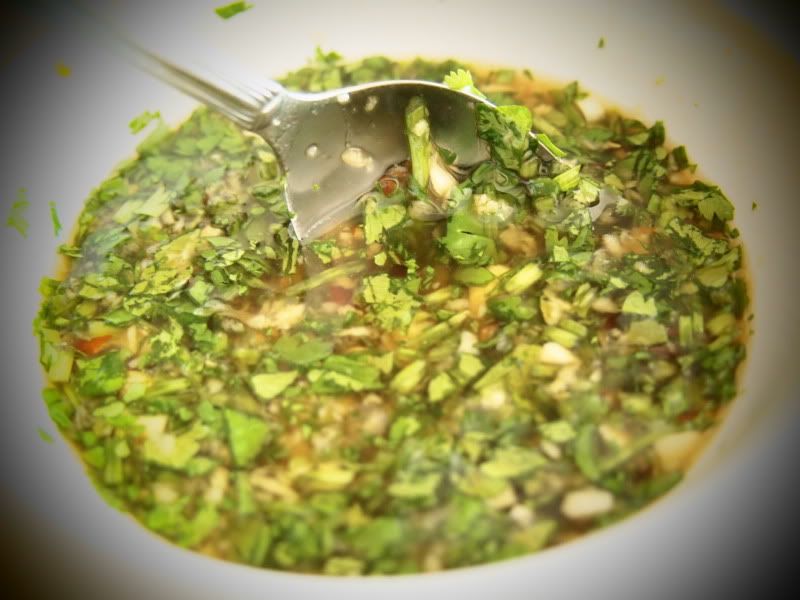
1) Preheat the oven to 190 c (375 F/ Gas 5). Place the garlic, fish sauce, lemon juice, ginger, chili sauce, coriander, rice wine vinegar and wine in a jug and mix together well.


Photobucket

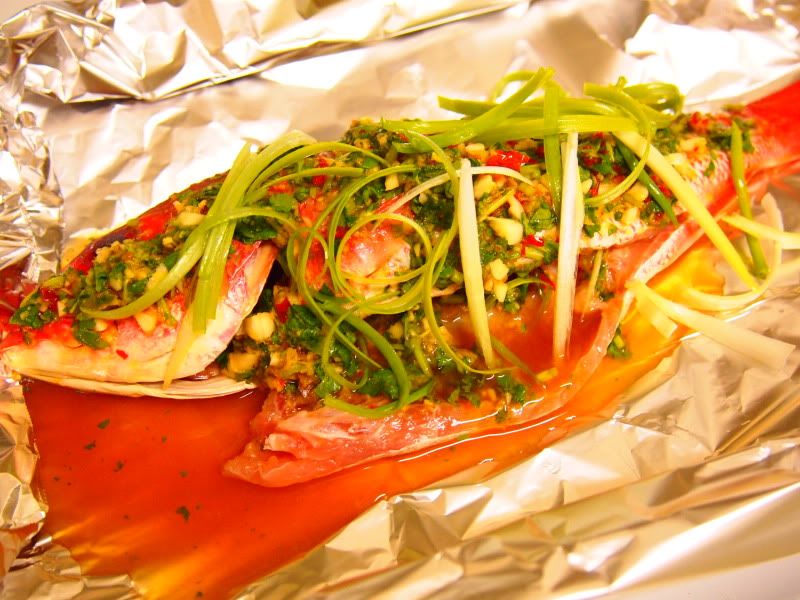
2) Place the snapper on a large piece of foil on a baking tray. Pour the marinade over the fish and sprinkle with spring onion.


Photobucket


3) Wrap some foil around the fish like a parcel and place in the oven. Bake for 20-30 minutes or until the flesh flakes easily when tested with a fork. Serve immediately with steamed rice.

Monday, July 25, 2011

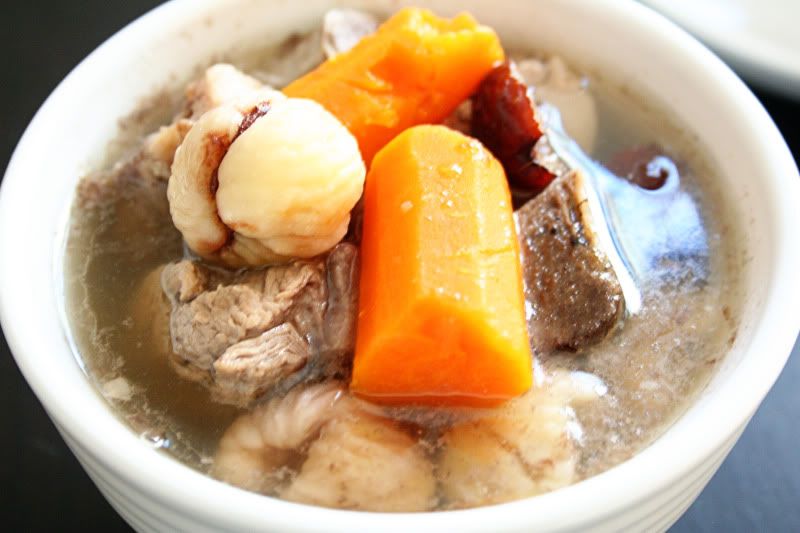
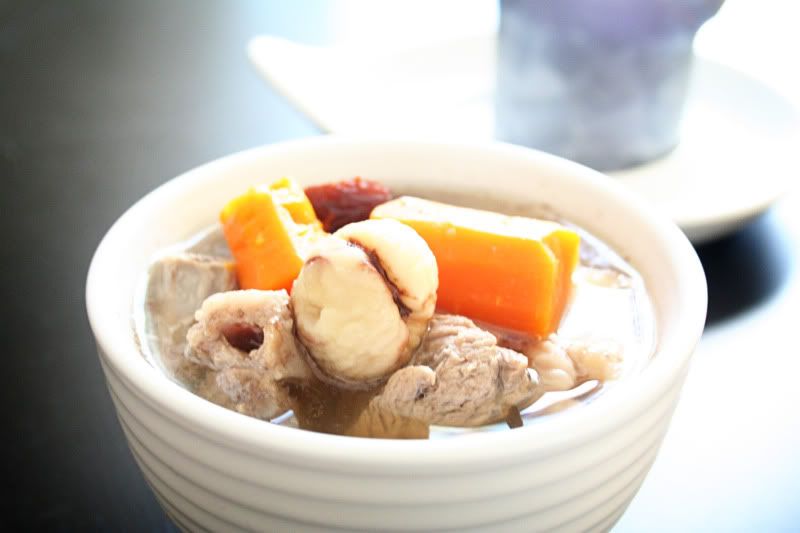
Pork Soup with Water Chestnuts & Red Dates Recipe

Photobucket


I’m not good in making soup like any others that I know. No basic in anything besides drinking. I’m totally regretted for not learning it in a younger age when I thought I don’t need it at all. And who knows I will be far away from everyone. I still believe in the saying “there never too late if we have the heart of willing”.  I started browsing and checking on recipe on how to make a simple soup and in the same times it still good for our body system.

What makes it harder for me is that, I don’t read Chinese nor understand the name of the herbs. I have to pictures every single of them and look for it at the store. Oh well, nothing I can do right now.

This soup actual helps you strengthens the lungs and spleen, expels phlegm and alleviates coughs. Red dates are known to be effective in countering fatigue, anemia and low energy level. Mostly used to build up strength and blood and often added to others herbs for the sweetest.

Ingredients:
2½ litres (10 cups) water
1 large or 2 small carrots, peeled and sliced
12 water chestnuts, peeled
8 red dates (hang zao), pited and rinsed
500g (1LB) lean pork, rinsed and scalded with boiling water
1 teaspoon salt, or to taste.


Method:
Bring the water to a boil in a stockpot. Add all the ingredients, except the salt, and cook over high heat for 20 minutes. Reduce the heat to low and simmer uncovered for 2 hours. Season with the salt and remove from the heat. Serve hot in individual serving bowls.


Photobucket

Monday, July 18, 2011

Lavender Cookies Recipe

Photobucket


This is one of my favorites cookies I have to say. Not because I baked well but because I personally like lavender. Couples months ago, I found out that there a lavender festival coming up and wanted to go every year but never did. Drive was long and this year was an exception because I found someone to come with us and drive was not as bad when you go with a group of fun friends. Thanks to my dear hubby for driving the girls. We indeed having a blast and enjoy the green around us with the scene of lavenders. 
 
Photobucket


This festival actually giving me an idea or inspire of doing some cooking or baking with it and got fresh herbs of lavender from them which I’m so excited to try it out. On the very same week, I baked cookies out of it. And guess what?? It came out perfectly and I’m totally in love with this cookies. So refreshing! And of course, I gave out some to my friends to try it out as well. A lot of feedbacks from them. Some said, it’s good to eat it with coffee and some love it with a cup of tea. So, either you’re a coffee or tea lover… this cookies just suit everything. Even a glass of wine!


Enjoy your baking & the cookies. Would love to hear from you back.

 Ingredients:
1 cup butter, softened
1 cup superfine sugar
1 large egg, lightly beaten
1¾ cups all purpose flour
2 tsp baking powder
1 tbsp dried lavender, chopped


Method:
Preheat the oven to 375F/190C. Line 2 – 3 large baking sheets with parchment paper. Place the butter and sugar in a bowl and beat together until light and fluffy, then beat in the egg. Sift together the flour and baking powder into the mixture, add the lavender, and stir well.

Place tablespoons of the mixture on the baking sheets, spaced well apart. Bake in the preheated oven for 15 minutes, or until golden brown. Let cool on the baking sheets for 5 – 10 minutes, then transfer the cookies to wire racks to cool completely.

Makes about 40
 

Photobucket


Photobucket

Monday, July 11, 2011

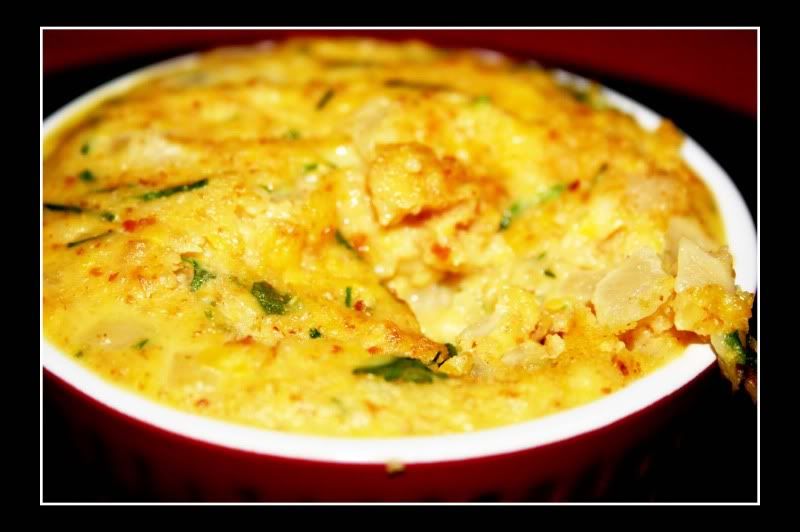
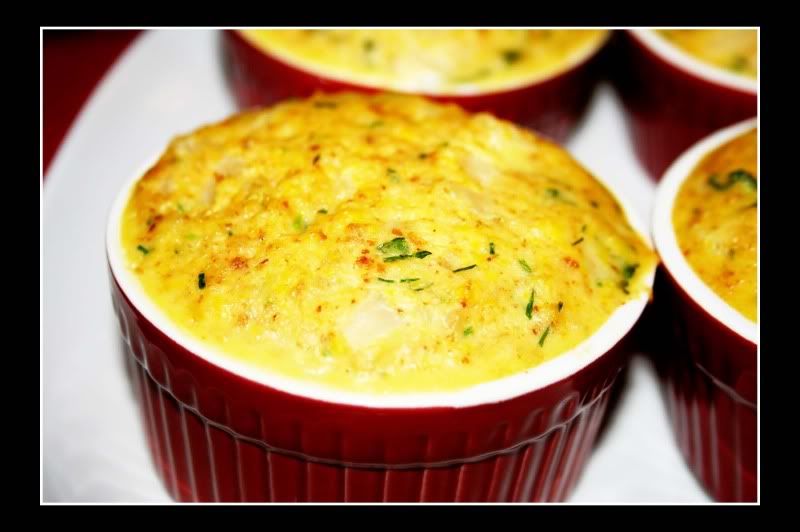
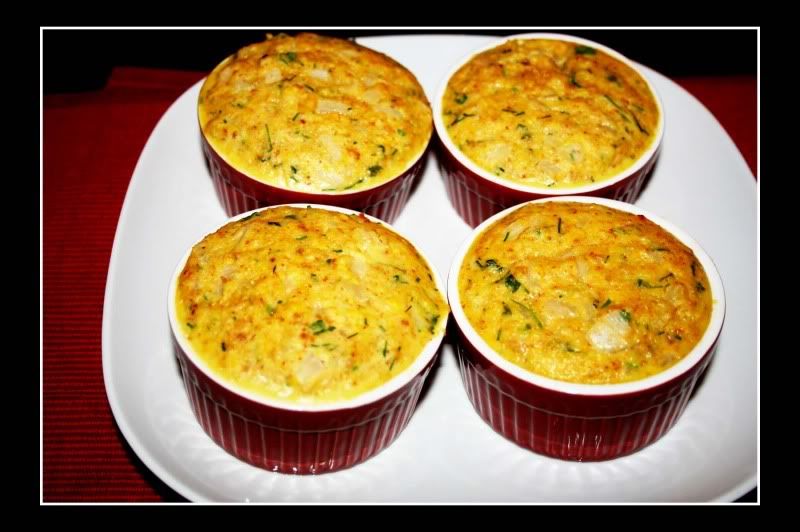
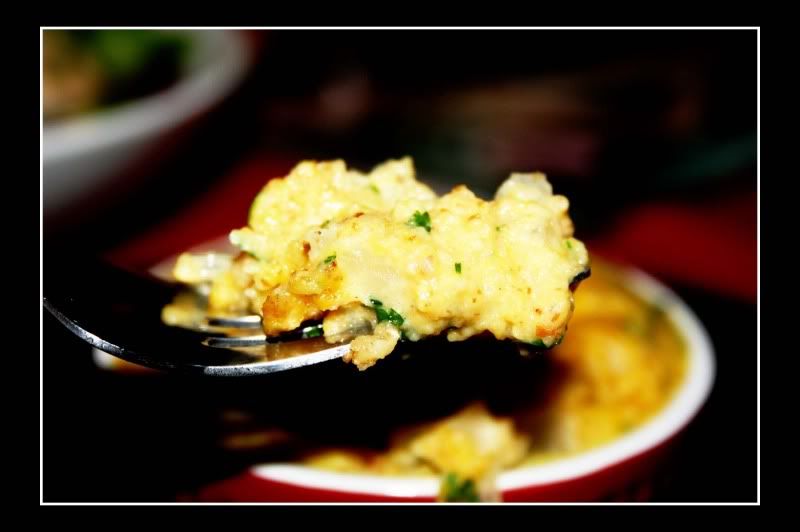
Corn and Bacon Crustless Quiches Recipe

Photobucket

It’s weekend again. Who don’t love weekend ya? My weekend always seem the fastest time that flew away. I had million of things I want to do with my hubby but it was ended up doing something else. Not that I hate it, just wishes that I have more time during the weekend.

Anyways, I have so much to write but I have some technical problem. Hmm….. Hopefully it will fix soon.

Today, I would love to show you a new recipe that I tried early on these days. Besides shopping, I love to cook. I love to try on new things and find more new taste on food same goes to life. Since it’s a weekend why not I share this recipe with you guys and you can try it at home with your love one. Let me know what you think about it. 
Ingredients:
4   corn cobs
2   teaspoons olive oil
2   rashers bacon, cut into thin strips
1   small onion, finely chopped
3   eggs, lightly beaten
2   tablespoons chopped chives
2   tablespoons chopped fresh parsley
¾  cup (60 g/ 2 oz) fresh white breadcrumbs
1/3 cup (80ml / 2 ¾ fl oz) cream

Method:

1)     1)  Preheat the oven to 180 C (350F / Gas 4). Lightly grease four ¾ cup (185ml / 6 fl oz) ramekins. Remove the husks from the corn and, using a coarse grater, grate the corn kernels into a deep bowl-there should be about 1 ½ cups corn flesh and juice.
 

2) Heat the oil in a pan and cook the bacon and onion for 3-4 minutes, or until the onion softens. Transfer to a bowl. Stir in the corn, eggs, chives, parsley, breadcrumbs and cream and season well. Spoon into the ramekins

3)Put the ramekins in a large baking dish. Add enough hot water to come halfway up the sides of the ramekins. Lay foil loosely over the top. Bake for 25-30 minutes or until just set. 

Photobucket


Photobucket


Photobucket


Note: Supposed to post it last Friday but too busy with my stuffs. Sorry!!

Tuesday, July 5, 2011

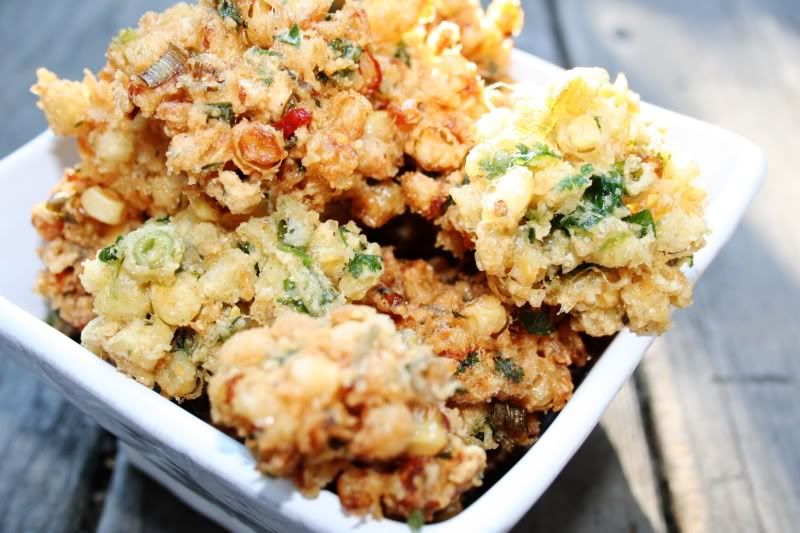
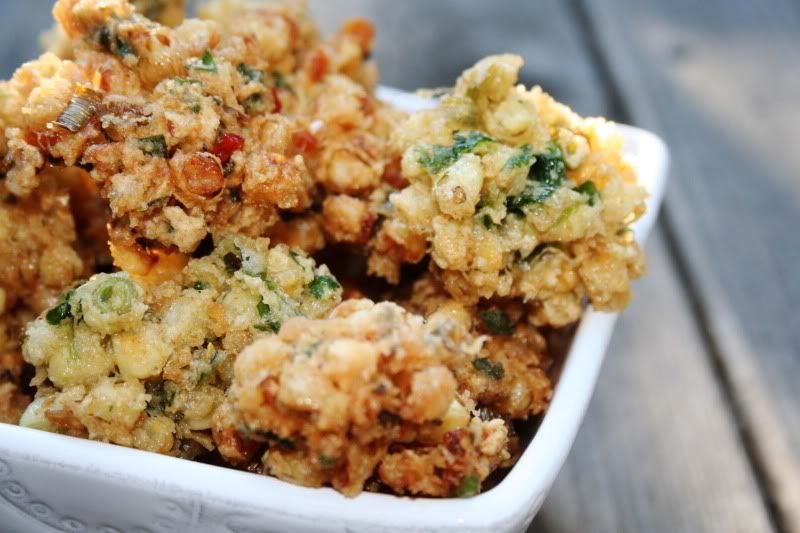
Spicy Corn Puffs Recipe

Photobucket


Corn is one of the famous vegetables. But my favorites are the yellow corns. I love making them for dinner but I wanted to try something new or different from it. I knew we could do so much with corns besides boiling them or stir fry them with butter and parsley and etc…

And corn puff is one of my experiments and it turned out…. DELICIOUS!! I love this snacks or appetizer already and it’s good for party too. And it’s not that hard to make either. Just a lot of chopping, which I don’t mind at all.

I’m running out of things to say on today post. Might be the heat that making me uncomfortable right now. Not going to waste anyone time. Check out the recipe below.


Ingredients:
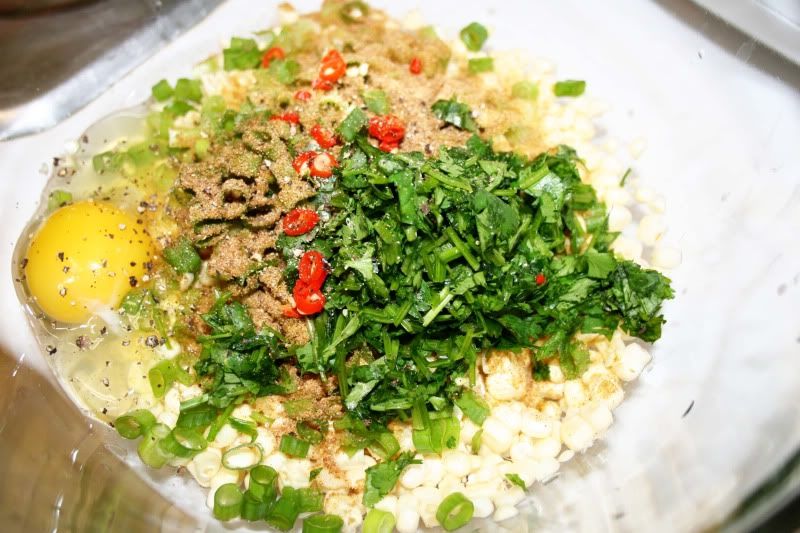
2 corn cobs
3 tablespoons chopped fresh coriander leaves
6 spring onions, finely chopped
1 small fresh red chili, seeded and finely chopped
1 large egg
2 teaspoons ground cumin
½ teaspoon ground coriander
1 cup (125g/ 4oz) plain flour
Oil, for deep-frying
Sweet chili sauce, to serve


Method:
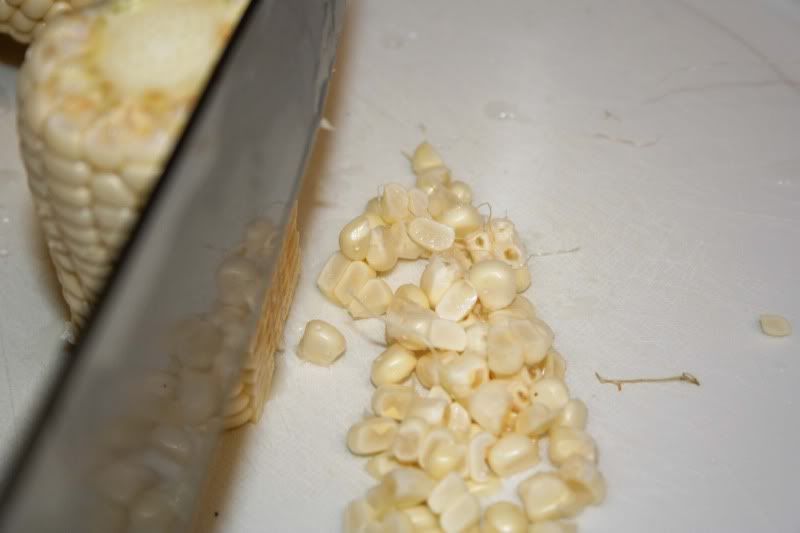
1)      Cut down the side of the corn cobs with a very sharp knife to release the kernels. Roughly chop the kennels, then place them in a large bowl. Holding the cobs over the bowl, scrape down the sides of the cobs with a knife to release all of the corn juice from the cobs.
Photobucket


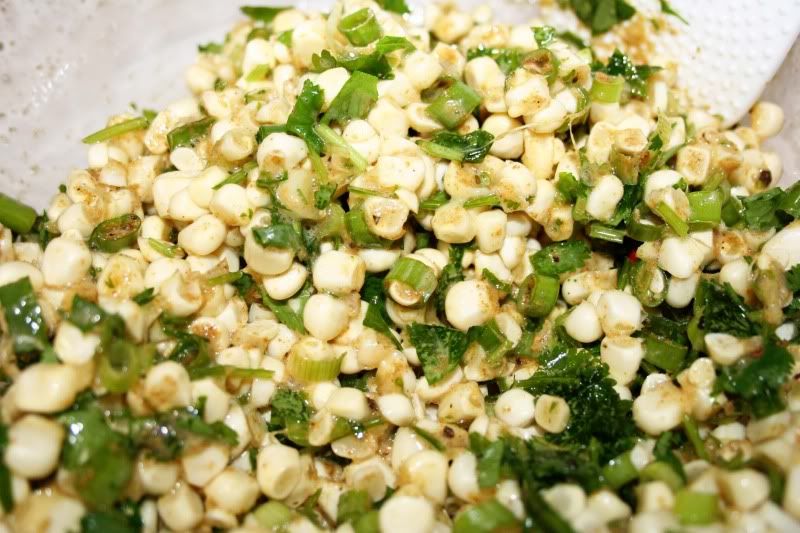
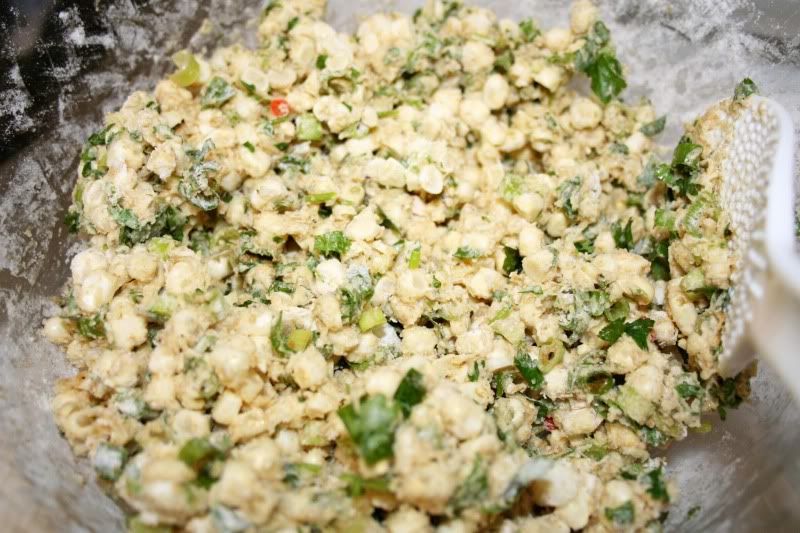
2)      Add the fresh coriander, spring onion, chili, egg, cumin, ground coriander, 1 teaspoon salt and freshly cracked black pepper to taste to the bowl, and stir well. Add the flour and mix well. The texture of the batter will vary depending on how much juice is released from the corn. If the mixture is too dry, add 1 tablespoon water, but no more than that as the batter should be quite thick and dry. Stand for 10 minutes.
Photobucket


Photobucket


Photobucket

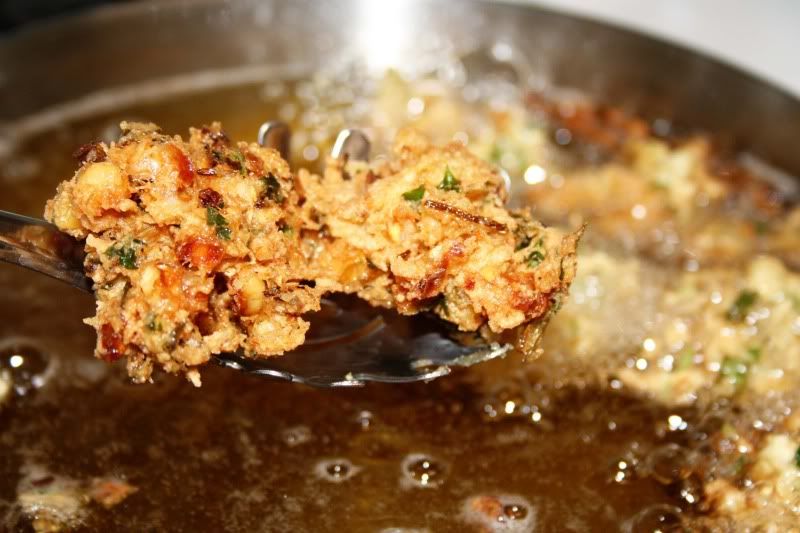
3)      Fill a large heavy-based saucepan or deep-fryer one-third full of oil ad heat to 180C (350F), or until a cube of bread dropped in the oil browns in 15 seconds. Drop slightly heaped teaspoons of the corn batter into the oil and cook for about 1 ½ minutes, or until puffed and golden. Drain on crumpled paper towels and serve immediately with a bowl of the sweet chili sauce to dip the puffs into.
Photobucket


Photobucket

Tuesday, June 28, 2011

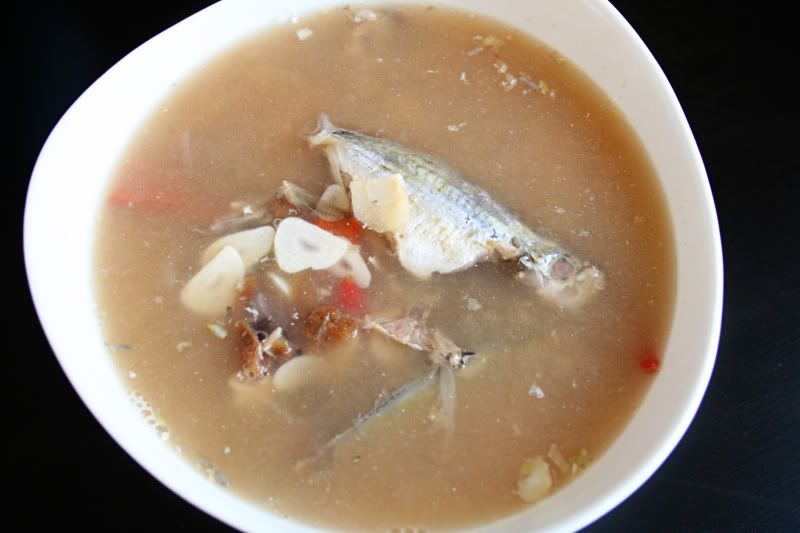
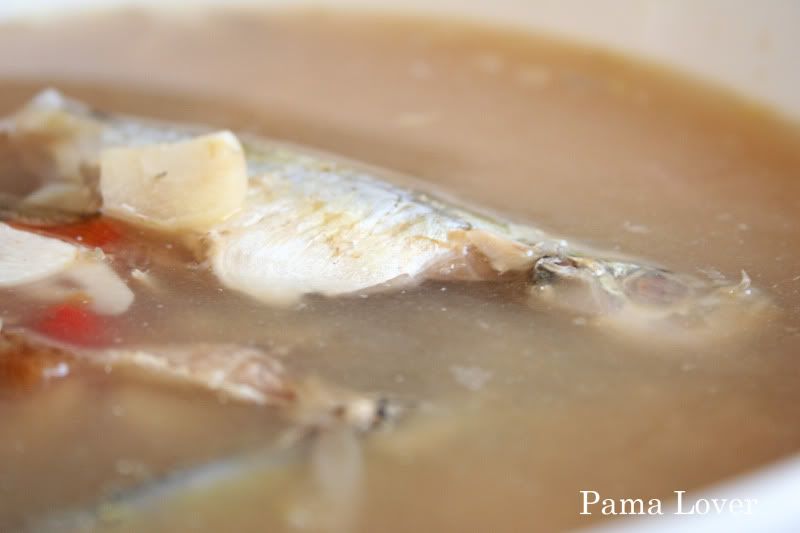
Tamarind Fish Soup Recipe (Sup Ikan Asam)

Photobucket


Sorry for my bad photo taking. I should have made it better looking.

Last week this dish just came to my craving. I miss home cook food from home. Bet everyone far away from home does have the moment of homesick and wish you can have your mama food. I wish I could have that.
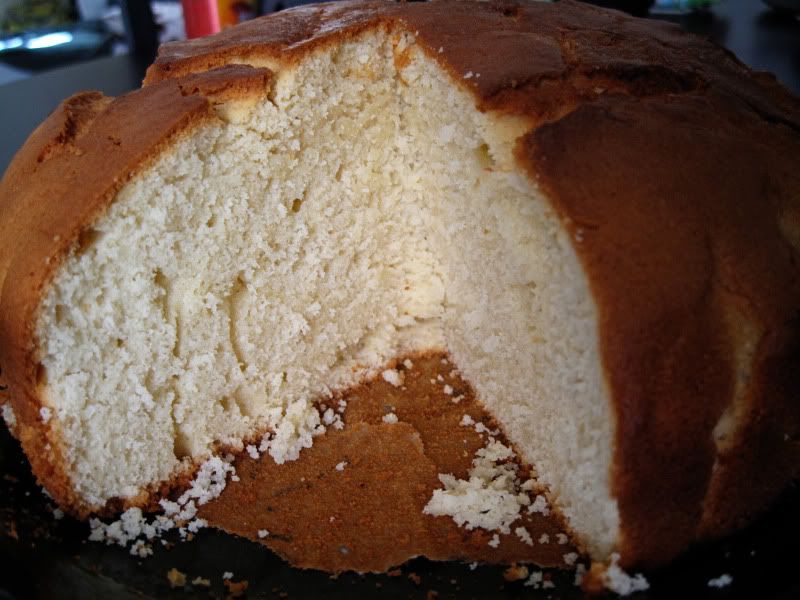
This dish is one of my comfort food. I like it because it’s sour, a little bit of spice and a little bit of sweetness. I like the tamarind juice from it. Soo…. Good if you eat it over rice. I’m not sure if every house in Malaysia cooks this dish but I have to say… this is one of the authentic dish from my home. You can’t get it at the restaurant at all. Believe it.. I don’t remember anything about eating this in any restaurant in Malaysia. And what more, they don’t even has this in the States. I have no other choices but to learn to cook it. It’s part of my sweet memories of my momo. She made this all the time. I miss her already. Can’t wait to go home.

I’m sharing this to everyone that far away from home and wish to have some of it. This is the recipe for you. Good luck in trying!!

Ingredients:
4 whole small mackerel (ikan kembong), about 600g (1½ lb),
or 4 mackerel steaks (ikan tenggiri)
750ml (3 cups) water
1 teaspoon salt
4 tablespoons tamarind juice (note below)
6 shallots, sliced
4 cloves garlic, sliced
1 cm (1/2 inch) fresh galangal root, peeled and sliced
2 red finger-length chilies, halved lengthwise, or
6 cili padi, deseeded


Method:
1)   If using whole fish, clean and rinse thoroughly.
2)   Place the water, salt, tamarind juice, shallots, garlic, galangal and chilies in a saucepan or wok and bring to a boil. Then lower the heat and simmer for 10 minutes.
3)   Add the fish and simmer gently until just cooked, about 8 to 10 minutes. Serve immediately with fragrant fluffy rice.
 

Photobucket

Note: tamarind imparts a fruity sourness to dishes. To make tamarind juice, mash about 1 tablespoon of tamarind pulp in 2 tablespoons of warm water, squeeze and strain to remove the seeds and fibers.

Friday, June 24, 2011

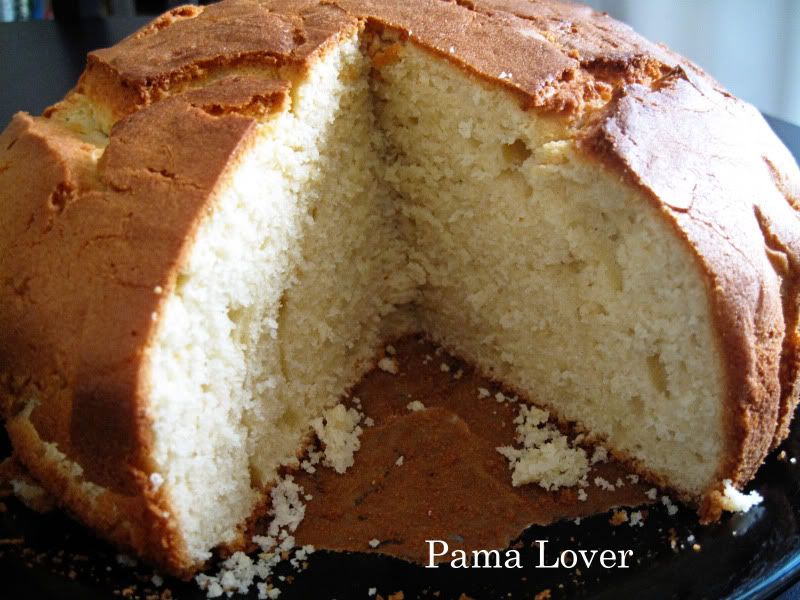
Butter Cake Recipe

Photobucket


Baking is one of my favorite things to do in my early adult. And that’s the only thing I won’t get nag by messing the kitchen. And cooking never my favorite but things changed as we grow up. I found out that my talent is actually my hand. I love art but I can’t draw but I’m good in doing crafts. What more… cooking and baking is one of them?

Well, I did not bake for a very long time since last November which I made red velvet cake. Most favorite cake in America and me myself love it too. I decided to bake since my lovely hubby got me a Kitchen Aid for my valentine. Maybe not romantic at all but I really need it. And it’s useful too. Think and think…. I should go back to a basic one when I first bake. BUTTER CAKE!!

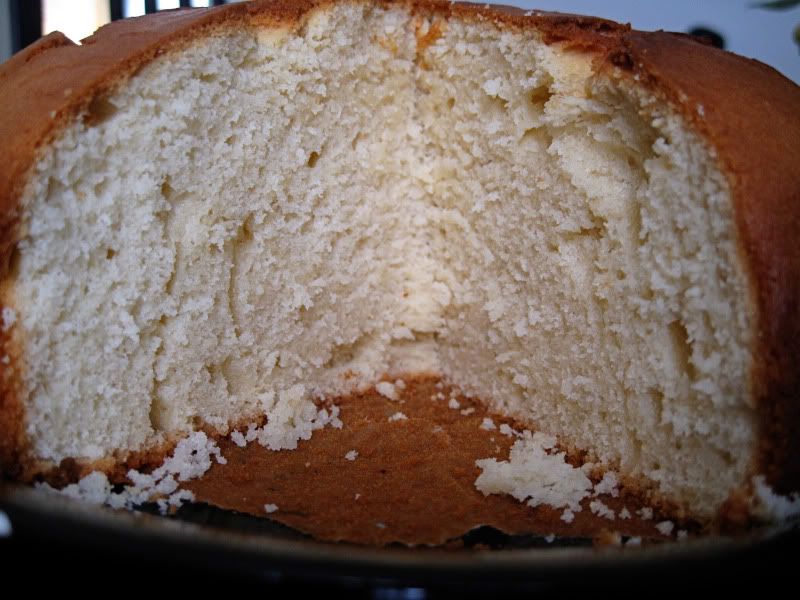
It might sound easy but it does not mean you can bake it perfectly. I love this recipe because it does not content a lot of sugar, which I perfectly like. I don’t like too much sweet on my stuffs. And the fluffiness of the cake is there and it’s moist. Everything just prefect!

Gave some of my friends to try it. Good review after all. One of the comments that I got from a friend – “It’s good! Taste better than Sara Lee. “ What can I say?


Ingredients:
280g (10oz) unsalted butter
225g (8oz / 1 cup) caster (superfine) sugar
1½ teaspoons vanilla essence
4 eggs
225g (8oz / 1¾ cups) plain (all-purpose) flour
185 ml (6 fl oz / ¾ cup) milk


Method:
1.     Preheat the over to 180C (350F/Gas 4). Lightly grease a deep 20cm (8 inch) round cake tin and line with baking paper.
2.     Place the butter and sugar in a mixing bowl and beat with electric beaters until light and creamy. Add the vanilla then the eggs, one at a time, beating well after each addition.
3.     Sift the flours together into a mixing bowl. Using a large metal spoon, add the combined flours alternately with the milk into the butter mixture, folding until smooth. Spoon into the prepared tin and smooth the surface. Bake for 1 ¼ hours, or until a skewer comes out clean when inserted into the center of the cake.
4.     Leave the cake in the tin for 5 minutes before turning out onto a wire rack to cook completely.

Storage : This butter cake can be kept in an airtight container in the fridge for up to 1 week, or for 3-4 days in an airtight container in a cook dry place. It can be frozen for up to 2 months.

Variation : to make a 22cm (8½ inch) round cake, bake for 1 hour 5 minutes. To make a 20cm (8 inch) square cake, bake for 55 minutes. To make a 23 cm (9 inch) square cake, bake for 55 minutes.
 

Photobucket


Photobucket

Sunday, June 19, 2011

Morimoto Restaurant, Napa


Hubby & our friends throw a surprised birthday trip for me. Don’t you agree that I’m the luckiest girl? A good hubby and good friends! They bought me to Napa to have some wine and a wonderful dinner. Of course, I kinda know something is fishy before the weekend came cause I’m cool like that. Just kidding…. Everyone spilled a little hint somewhere between the conversations through out the weeks. And I just have to put it together till the last day. In the end… who cares? It’s all about having good time with good companions. Agree??

I’m going to skip the winery experience and jump to our scrumptious dinner. Why? Because this restaurant deserve the write on my page. I don’t usually write about restaurant but I thought about it over and over again… why not? Since I’ve been to many restaurants and tried million of food. I should start writing about my experiences in every single one of them.

As I walked in to the restaurant; it does felt a bit weird on the restaurant setting  with the front and the back of the restaurant. The front seems to be serving a fast food kinda theme. And the back is where the real dining area. You get to see the kitchen and the bar as you continue walking in the restaurant. And you are surprised to see how many chefs working on your food in the kitchen. Maybe I should put it this way…. Sous chefs of Morimoto. Before that, the greater was excellent! Great smile! We got seated less than 3 minutes, which we got our reservation done.

 Our server is a nice gentleman. I’m glad that he actually explained to us everything and what he recommended us as a first time diner. And we all agreed and decided to have the sample set which cost $120 per person. And I’m glad we choose it.

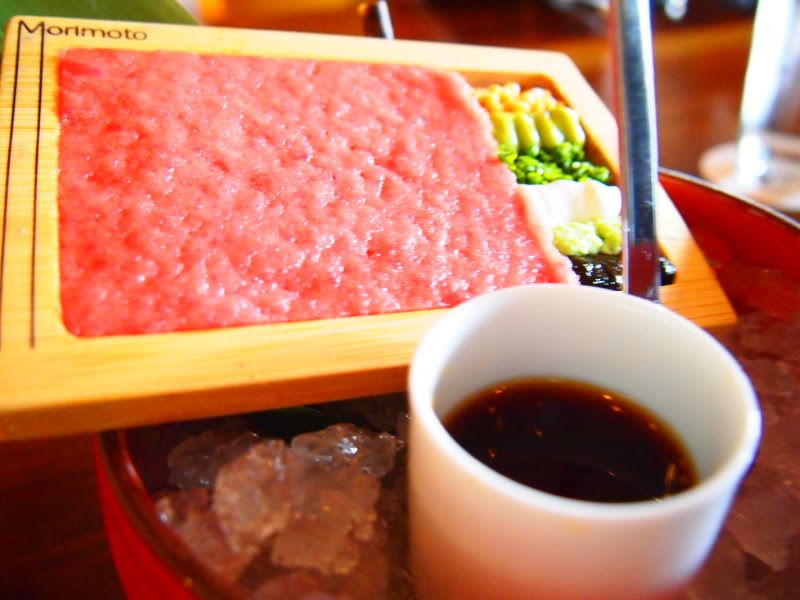
Our very first place that came out that evening is Toro Tartar! OMFG!! I have to say… it’s my best tartar ever. I never tried toro tartar before and I have to say the BEST! I thought Kobe beef was the best for me… but today… I can’t forget the taste of the toro tartar. They have 6 different mix for your tartar plus a soy sauce for you to rub on the mince toro meat.    

Photobucket

Photobucket


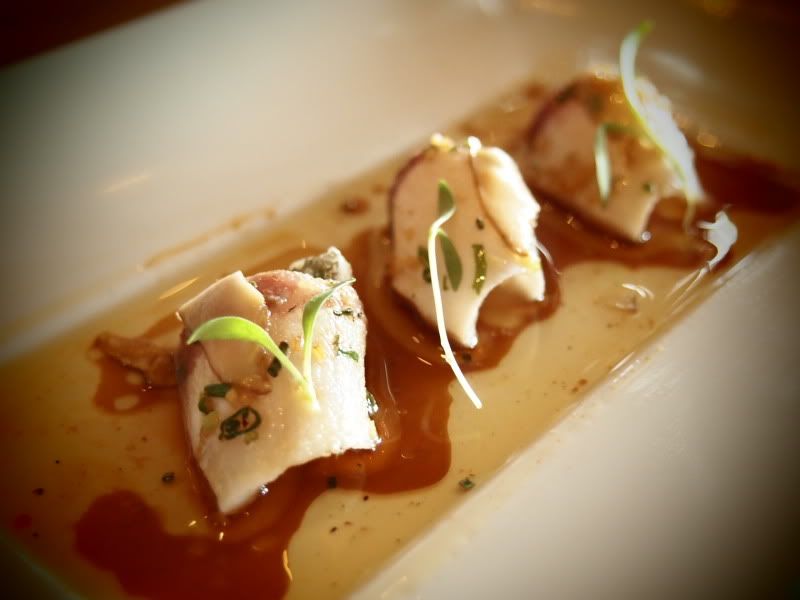
Second plate that came out that night is Hamachi fish. I won’t say this is the best I try. It’s okay for me. The best Hamachi fish I tried yet is at Honolulu. Hawaii. I felt like… they did not use a charcoal to aroma the fish and the lack of lemon juice. My personal opinion, okay! 

Photobucket


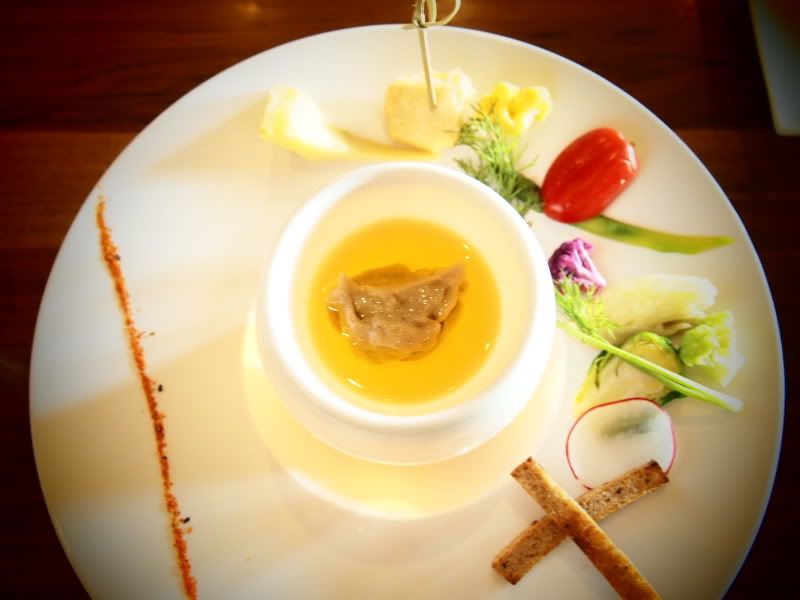
Third, Morimoto style of fondue! Very interesting. As you can see on the photo below; the middle bowl for you to dip on your vegies is actually anchovies paste with oil. Not my favorite dish so far.
 
Photobucket


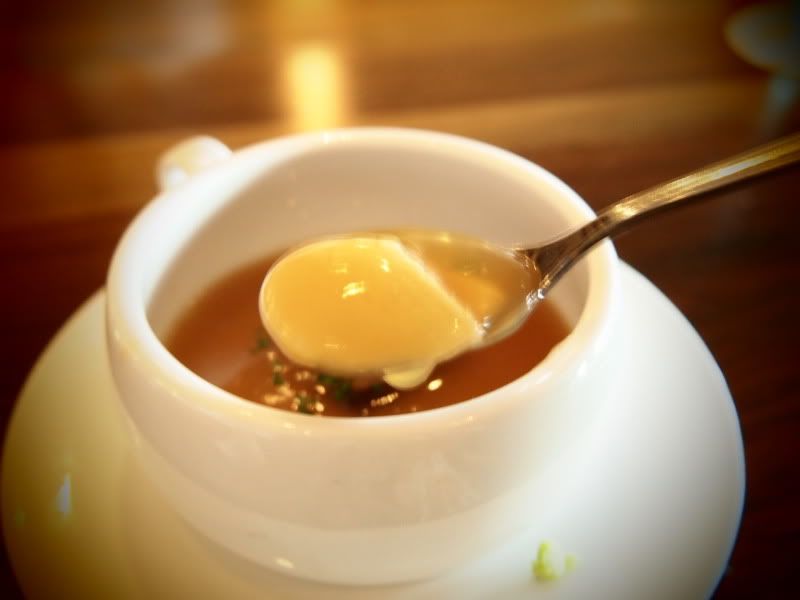
Fourth, Foie Gras chawanmushi! I personally love chawanmushi. Anything with eggs is love. This is one of the best for me. The mix foie gras with egg perfectly well blend in this dish. You can taste a pinch of the foie gras when you take a big bite. And what interesting in this dish is that, they gave u a dot of wasabi for you. Take a bit out of it and eat it together with your egg custard. Totally YUM O!! And you get few slices of duck meat in it. Just dig it!!
Photobucket


Photobucket


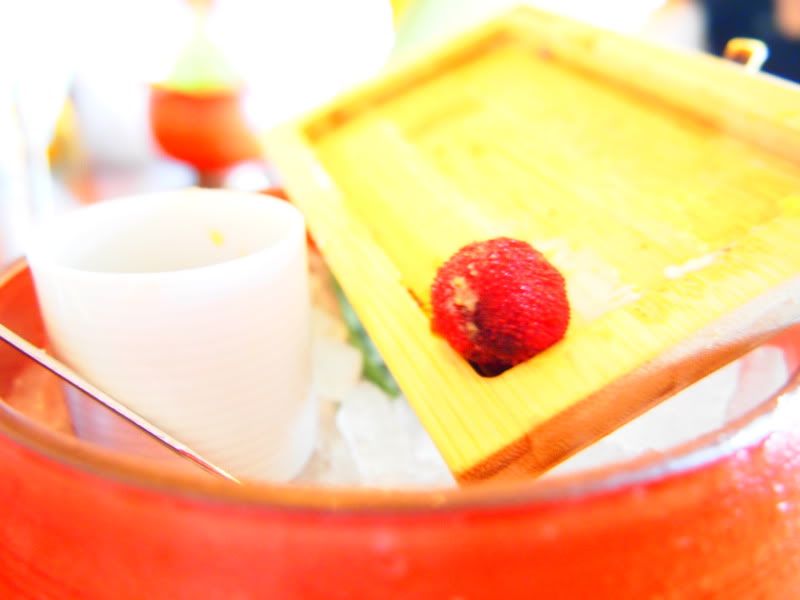
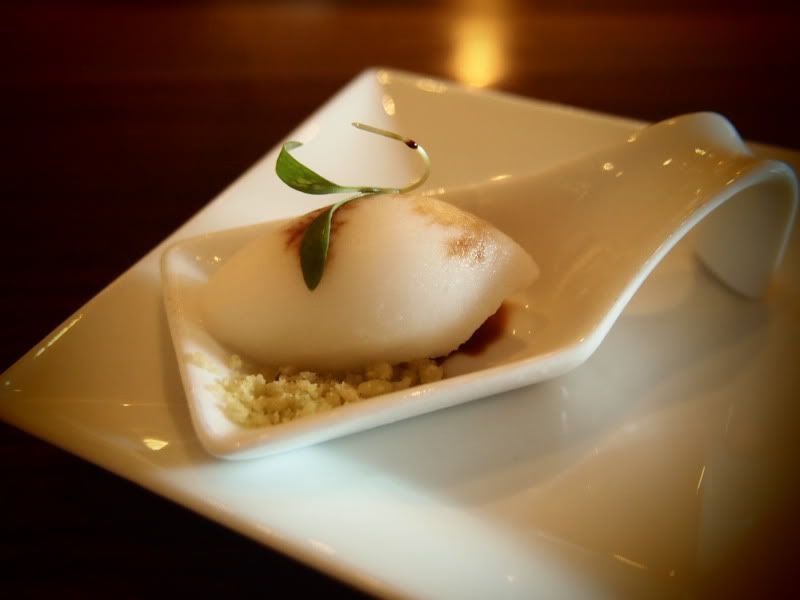
And last appetizer for the night, Sorbet with 10 years old soy sauce with some sweet cracker. Love it! When you put everything in your mouth… all you can feel it’s COLD and then it started to melt in your mouth. The sour-ness and sweetest of the soy sauce… … and I’m speechless.
 
Photobucket


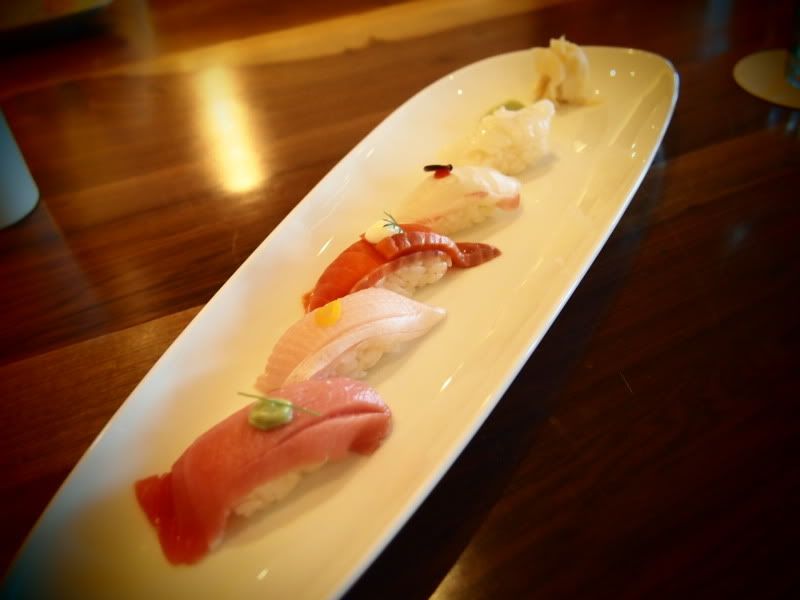
Then…. Our main course came. First plate from the entrée is special pick from the chef for our nigiri. BEST fishes ever!! Best I tried. I have no idea how they ship it to the restaurant and maintain the best flavor of it. Fish was fresh, sweet and the texture of it.. My God!!
Photobucket


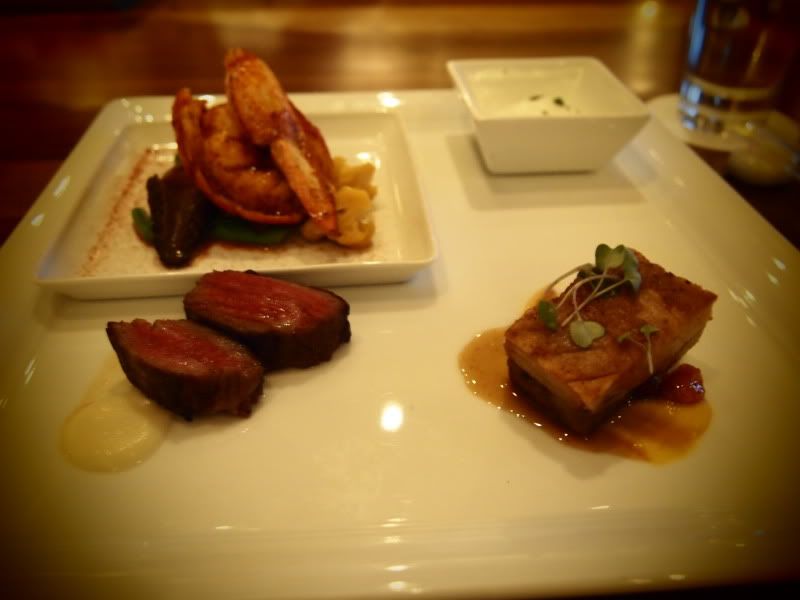
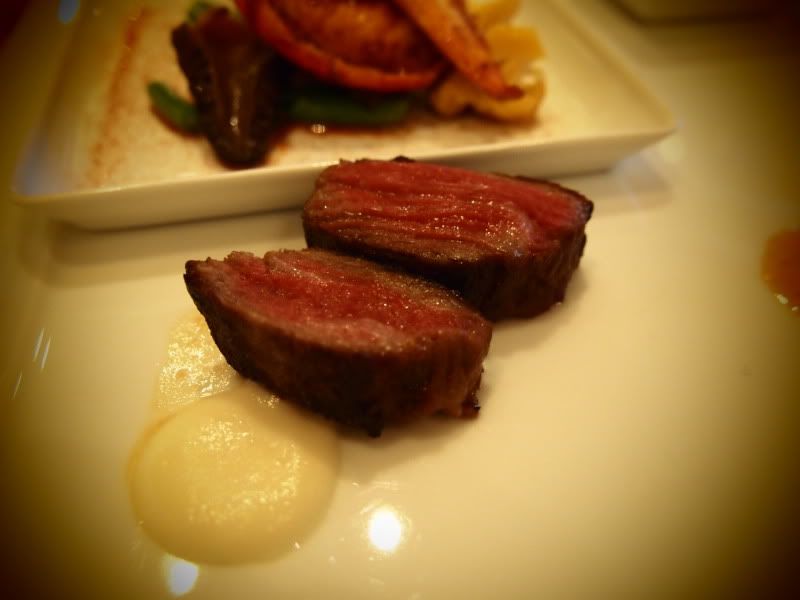
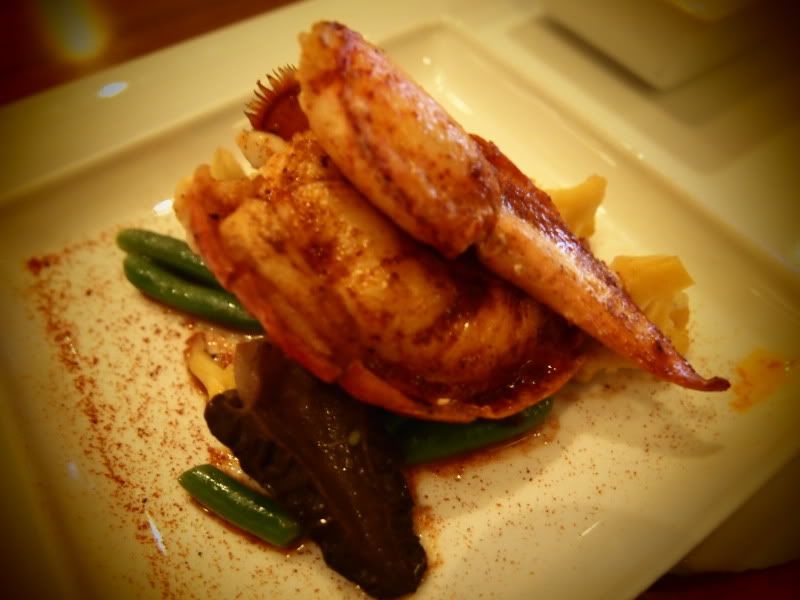
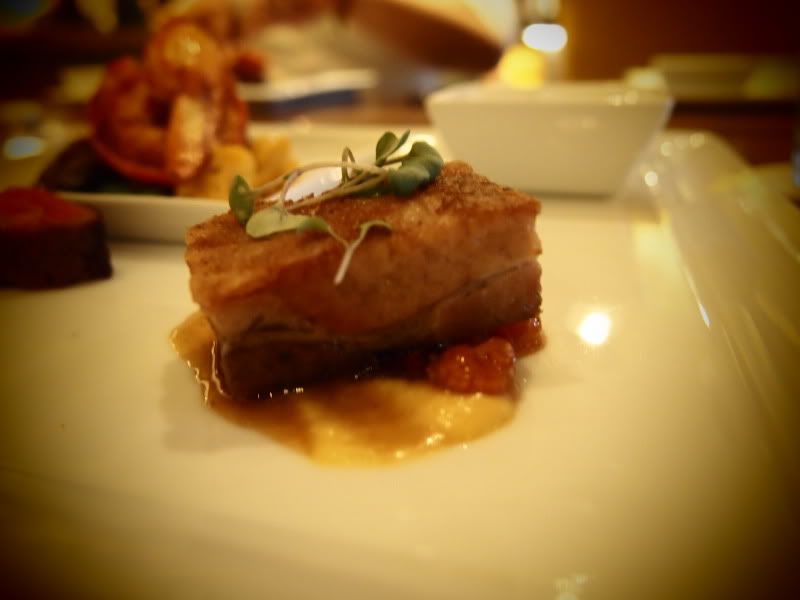
Second and last plate of the entrée is the surf and turf plate. Beef is Good. Sweet and tender. Pork, not my favorite of the night and the lobster is inspired by the southern. Cajun Style! My lobster is a bit over cook.
 

Photobucket


Photobucket


Photobucket


Photobucket


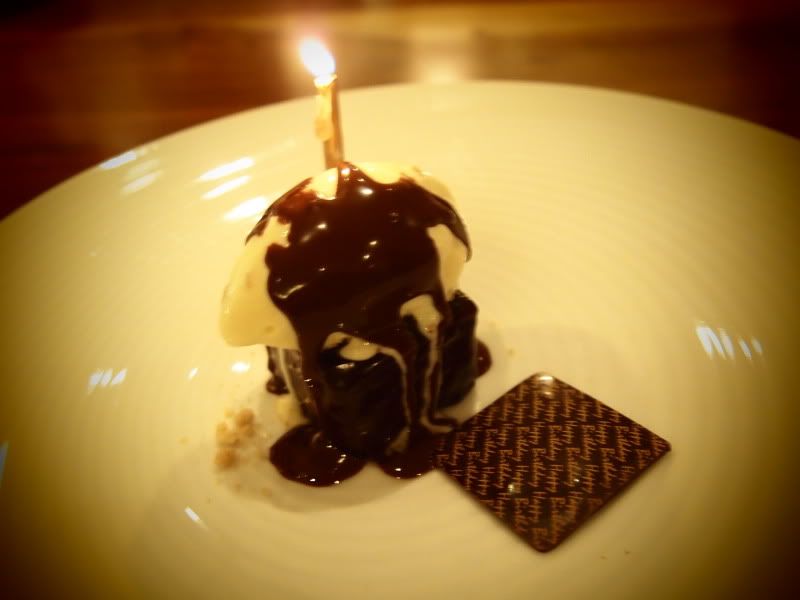
Last but not least, desert time! Favorite of the night! How I wish I can have my cream brute but that’s not the case. I’m not sure which one has the ginger taste of it. Ice cream or the cake but I just hate it. I can’t even continue having another bite after having it the 3 bites. I’m not a ginger person. So…. Sorry! Not liking it.

Photobucket


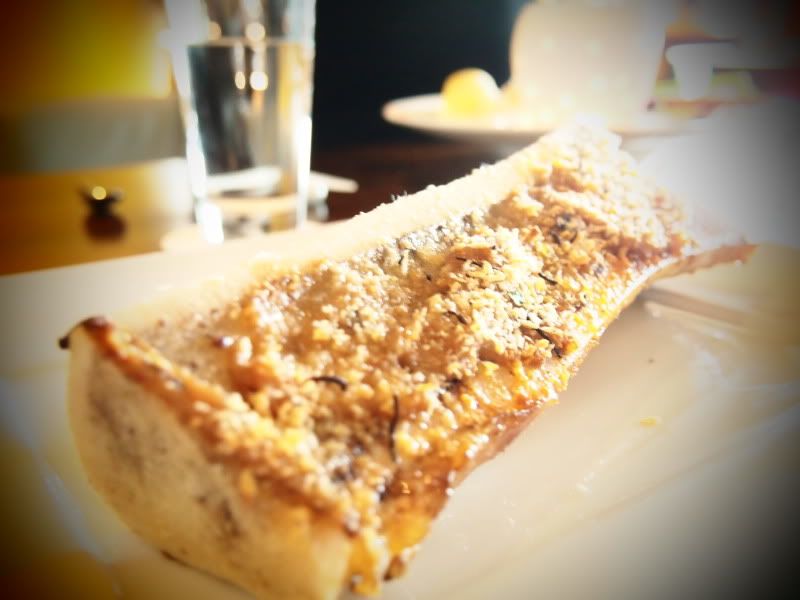
Before I end this post. There some more treats for all of you. We ordered a bone narrow to stop our craving and curiosity on the taste in the restaurant. I don’t think you need me to say anything bout it. Pictures speak a million words out of it.
 
Photobucket


WAIT…. More!
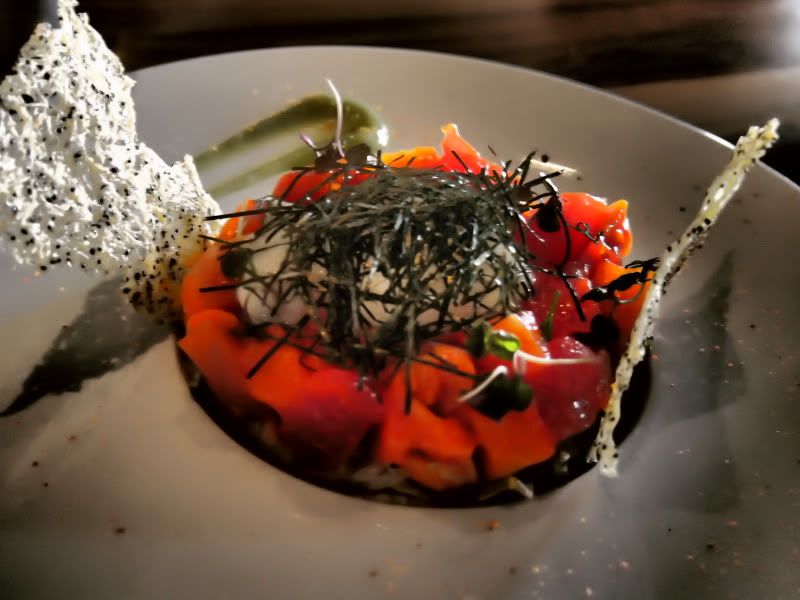
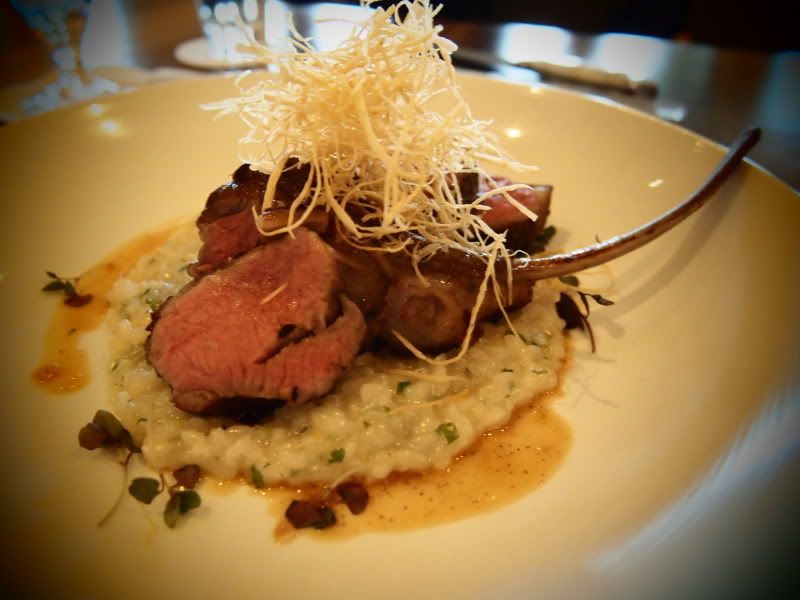
One of my friends decided not to join our sampler but to have her own adventure. And here is her own meal of the night.

I’m not so sure what is this. But base on her, this is Chirashi. Took a bite and it’s GOOD!
Photobucket


Rack of lamb with risotto. She finishes it. You can tell it’s really good!
Photobucket


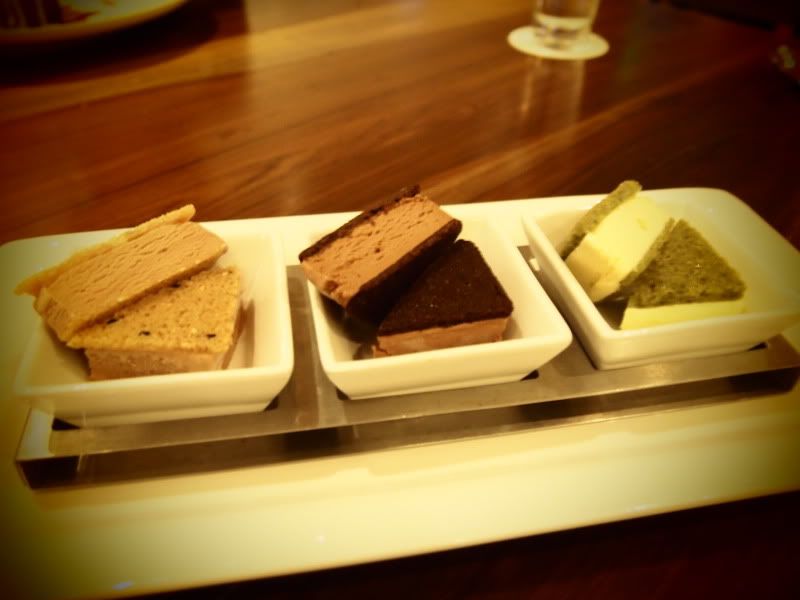
Ice Cream Sandwiches. Sesame, Chocolate, Green Tea.
Photobucket


610 Main St
Napa, CA 94559